Delectable Blackout Cake Recipe: Decadence in Every Bite
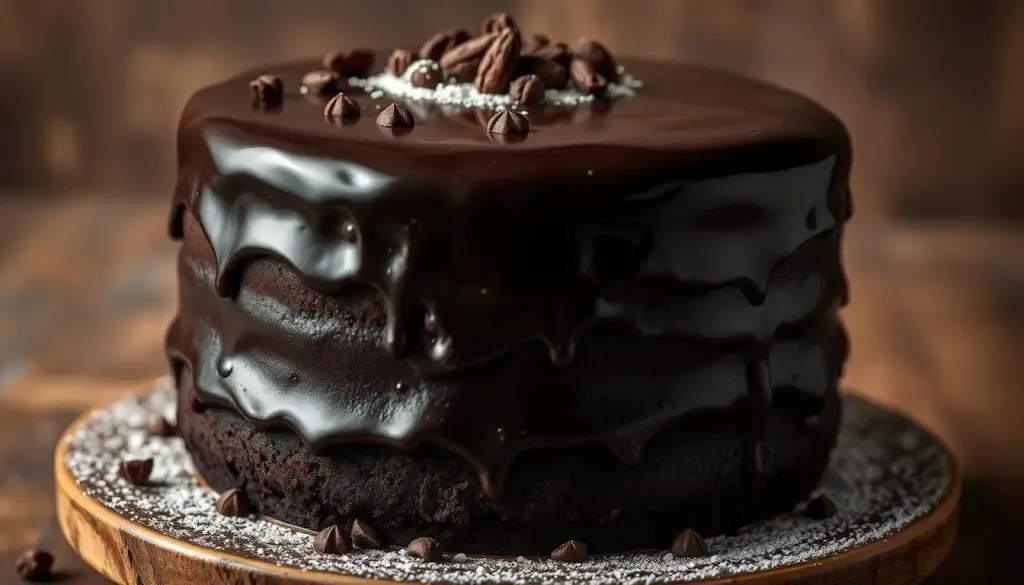
The Blackout Cake Recipe is a dream for chocolate lovers. It has a rich, decadent flavor and a moist texture. This cake is a classic for a reason. It’s all about balance and flavor.
With its deep, dark chocolate taste and smooth frosting, it’s a favorite.
If you’re looking for an amazing chocolate experience, try the Blackout Cake Recipe. It’s perfect for both experienced bakers and beginners. Its simple yet elegant design makes it great for any event. So, why choose an ordinary cake when you can have a Blackout Cake Recipe?
Key Takeaways
- Rich, decadent flavor and moist texture make the Blackout Cake Recipe a standout among cake recipes
- Deep, dark chocolate flavor and velvety smooth frosting set this cake apart from other chocolate cake recipes
- Perfect for any occasion, from birthdays to weddings and beyond
- A must-try for chocolate lovers and those looking for a truly exceptional cake experience
- Simple yet elegant design makes it a great choice for any gathering or celebration
The Rich History of Blackout Cake
Blackout Cake has a rich history of Blackout Cake that goes back to the 19th century in Brooklyn, New York. It was first made as a special dessert in the city’s lively baking scene. The recipe has changed over time, adding new ingredients and techniques, yet keeping its classic charm.
The cake origins of Blackout Cake are linked to Brooklyn’s European immigrant community. They brought their baking traditions with them. The cake became famous for its moist texture and deep chocolate taste. Now, it’s a favorite dessert in New York, with many places offering their take on it.
- It was originally called “Blackout” due to the dark color of the cake, which was achieved using a high percentage of cocoa powder.
- The cake’s signature chocolate pudding filling was added later, as a way to enhance the dessert’s richness and flavor.
- Blackout Cake has been featured in numerous food publications and has gained a cult following among chocolate lovers.
Exploring Blackout Cake reveals its special place in many hearts. Whether you’re a local or just visiting, trying a slice of authentic Blackout Cake is a must. With its rich history of Blackout Cake and deep roots in Brooklyn, New York, this cake is sure to satisfy any sweet tooth.
Essential Ingredients for the Perfect Blackout Cake Recipe
To make a rich Blackout Cake, focus on the quality of each cake ingredient. The right mix of baking essentials will make the cake taste and feel amazing. Choosing the best chocolate is key, as it’s the main flavor in this recipe.
A list of necessary ingredients for the Blackout Cake Recipe includes:
- High-quality dark chocolate for the cake and frosting
- Essential cake ingredients like flour, sugar, and eggs
- Baking essentials such as baking powder, salt, and vanilla extract
Choosing the right chocolate is crucial. It gives the cake its unique taste and texture. Opt for dark chocolate with a high cocoa content for the best flavor. By using top-quality cake ingredients and baking essentials, you’ll make a decadent Blackout Cake that will wow everyone.
With the right ingredients and practice, you’ll make a stunning Blackout Cake. It’s perfect for any event. Whether you’re experienced or new to baking, the secret to success is using the best cake ingredients and baking essentials. Pay close attention to chocolate selection too.
Kitchen Equipment and Tools Needed
To make the Blackout Cake, you need the right tools. This includes kitchen equipment like mixers, whisks, and measuring cups. The right baking tools are key to a great cake.
Cake pans are very important for baking. Use non-stick pans that fit the recipe well. You’ll also need a rubber spatula, electric mixer, and whisk.
Here are some key tools and equipment needed:
- Mixing bowls
- Measuring cups and spoons
- Electric mixer
- Rubber spatula
- Whisk
- Cake pans (non-stick)
Good kitchen equipment and tools make the Blackout Cake moist and tasty. Quality kitchen equipment and baking tools improve your baking experience.
With the right cake pans and tools, you can focus on making a perfect Blackout Cake. Enjoy the baking process!
Understanding the Science Behind Dark Chocolate Selection
Choosing the right dark chocolate is key when baking. The science shows that dark chocolate’s flavor changes with its cocoa content. Dark chocolate with more cocoa tastes stronger, while less cocoa makes it milder.
The cocoa solids percentage is also important. High-quality dark chocolate usually has at least 70% cocoa solids. This makes the chocolate taste richer and more complex. For recipes like the Blackout Cake, picking the right dark chocolate is crucial.
When picking dark chocolate, think about its flavor. Different chocolates can taste like fruit, nuts, or spices. These flavors can either match or clash with other ingredients in your recipe. Knowing about dark chocolate helps bakers mix flavors perfectly.
Brands like Ghirardelli, Lindt, and Valrhona are great for baking. They offer chocolates with various cocoa levels and tastes. Whether you’re a pro or a home cook, understanding dark chocolate can make your baking better.
Step-by-Step Blackout Cake Preparation Method
To make the perfect Blackout Cake, you need a step-by-step guide. This guide helps you plan and execute the baking method. It ensures your cake is moist and delicious. It’s key for both beginners and experienced bakers to make an amazing Blackout Cake.
The first step is to prepare the cake batter. You mix dry ingredients like flour, sugar, and cocoa powder with wet ingredients like eggs, milk, and butter. It’s important to follow a specific baking method. This includes preheating the oven and baking the cake for the right amount of time.
- Preheat the oven to 350°F (180°C)
- Mix the dry ingredients together in a bowl
- Combine the wet ingredients in a separate bowl
- Gradually add the dry ingredients to the wet ingredients and mix until well combined
By following this guide, you can make a delicious Blackout Cake. It will impress your friends and family. Always use high-quality ingredients and follow the baking method carefully for the best results.
Creating the Signature Chocolate Pudding Filling
To make a decadent Blackout Cake, the chocolate pudding filling is key. This filling makes the cake stand out. It’s all about using top-notch chocolate and the right cooking methods.
For the filling, mix dark chocolate with heavy cream. This combo gives the filling its smooth, creamy texture. Unlike other recipes, heavy cream is better here for the perfect consistency.
Here are some tips for making the perfect chocolate pudding filling:
- Use high-quality dark chocolate for the best flavor
- Cook the mixture over low heat to prevent burning
- Whisk constantly to achieve a smooth consistency
- Let the filling cool before using it as a cake filling
Follow these tips and use the right ingredients for a delicious chocolate pudding filling. This filling is crucial for the Blackout Cake. With practice, you’ll master it. It’s a hit with friends and family, adding richness to any dessert.
Mastering the Chocolate Crumb Coating
To get a stunning chocolate crumb coating, you need to know how to make and apply the crumbs. This skill is key in cake decorating. It gives the cake a rich, velvety texture and a deep, dark color. The coating is made by crushing chocolate cookies or wafers into fine crumbs.
These crumbs are then applied to the cake using a special technique. The crumbs should be evenly spread and stick well to the cake. This is done by using a little chocolate pudding or frosting as “glue.” You can use a spatula or a brush to apply the crumbs, depending on the look you want.
Some tips for mastering the chocolate crumb coating include using high-quality chocolate crumbs. Also, apply the crumbs in a thin, even layer. And, use a turntable to rotate the cake for an even coating. By following these tips and practicing, you can make a stunning chocolate crumb coating.
Here are some benefits of using chocolate crumbs in cake decorating:
- Adds texture and depth to the cake
- Creates a rich, velvety appearance
- Can be used to create intricate designs and patterns
By adding chocolate crumbs to your cake decorating, you can make stunning and unique cakes. Whether you’re a professional baker or a hobbyist, mastering the chocolate crumb coating technique will elevate your skills.
Expert Tips for Cake Assembly
Assembling a Blackout Cake needs precision and patience. It’s all about careful layer stacking, avoiding crumbs, and using cake decorating tips. Knowing the basics of cake assembly is key for a beautiful cake.
For layer stacking, place each layer flat, spread frosting in between, and press gently. This keeps the cake light and the frosting even.
To avoid crumbs, handle the layers carefully and use a turntable or cake stand. This makes decorating easier and keeps crumbs away. Experts suggest using a little frosting for decorations and adding a border for a final touch.
Here are more tips for cake assembly:
- Use a level to ensure the cake is even and straight
- Apply a thin layer of frosting to the outside of the cake to create a crumb coat
- Chill the cake in the refrigerator for at least 30 minutes to set the frosting
Storage and Serving Recommendations
Keeping the Blackout Cake fresh is key. Store it in an airtight container at room temperature for up to 3 days. For longer storage, refrigerate for up to 5 days or freeze for up to 2 months.
The Blackout Cake is great on its own or with other sweets. Try it with vanilla ice cream, chocolate-dipped strawberries, or whipped cream. Always slice the cake just before serving to keep it moist.
Here are some tips for serving and storing the Blackout Cake:
- Store the cake in an airtight container to maintain freshness
- Refrigerate or freeze the cake for longer storage
- Slice the cake just before serving to prevent drying out
- Pair the cake with other desserts, such as ice cream or whipped cream, for a unique treat
Follow these serving recommendations and cake storage tips to enjoy the Blackout Cake at its best. Handle it with care and pair it with other desserts for a special treat. With proper dessert handling and storage, the Blackout Cake will be a hit at any event.
Common Troubleshooting Tips
When baking a Blackout Cake, troubleshooting is crucial for a perfect dessert. Even with careful planning, cake problems can still happen. Here are common issues and their baking solutions.
Texture and frosting issues are common. These include a dense or dry cake and frosting that’s too runny or thick. Temperature problems can also affect your cake.
Here are some troubleshooting tips to help:
- Double-check your ingredient measurements for accuracy
- Adjust your oven temperature to avoid overcooking or undercooking
- Choose the right flour and sugar for the texture you want
By using these baking solutions and being aware of cake problems, you’ll make a stunning Blackout Cake. Stay calm and patient, as troubleshooting is part of baking.
With practice, you’ll master baking and solve any cake problems. Happy baking!
| Common Issues | Baking Solutions |
|---|---|
| Dense or dry cake | Check ingredient measurements, adjust oven temperature |
| Runny or thick frosting | Adjust frosting consistency, use right type of sugar |
| Temperature-related challenges | Use oven thermometer, adjust baking time |
Conclusion
As we wrap up our journey into the world of Blackout Cake Recipe, it’s clear this dessert is a masterpiece. It has a rich history in Brooklyn and requires careful attention to detail. This cake shows the power of thoughtful baking.
In this guide, we’ve looked at the key ingredients, special equipment, and the steps to make an amazing Blackout Cake. With the tips and insights shared, home bakers can now make this iconic treat. Their homes will fill with the amazing smell of chocolate and pure indulgence.
When you enjoy the last bite of your homemade Blackout Cake, think about the joy of baking. It’s a pleasure to share this delicious treat with loved ones. The art of making something so tasty from simple ingredients shows the power of culinary passion. Enjoy the feeling of mastering this recipe and keep exploring the world of baking.
FAQ
What is the history behind the Blackout Cake?
The Blackout Cake comes from Brooklyn, New York, during World War II. It was called “Blackout Cake” because sugar and chocolate were scarce. Bakers made a rich cake that chocolate fans loved.
What are the essential ingredients for the Blackout Cake recipe?
You need dark chocolate, unsweetened cocoa powder, eggs, sugar, flour, and butter for the Blackout Cake. The chocolate’s quality affects the cake’s flavor and texture.
What kitchen equipment and tools are needed to make the Blackout Cake?
You’ll need baking pans, a mixer, a saucepan, a whisk, and tools for frosting. Good equipment helps the cake bake right and the frosting go on smoothly.
How do I select the right dark chocolate for the Blackout Cake?
Choose dark chocolate with at least 70% cocoa content for the best flavor. Try different brands and percentages to find your favorite.
What is the step-by-step process for preparing the Blackout Cake?
First, mix the cake batter. Then, bake the layers. Next, make the chocolate pudding filling. Finally, assemble the cake with a crumb coating. Each step is important for the cake’s texture and taste.
How do I properly assemble and decorate the Blackout Cake?
Stack the cake layers carefully to avoid crumbs. Apply a chocolate crumb coating. For decoration, use chocolate ganache or cocoa powder for a stunning look.
How should I store and serve the Blackout Cake?
Store the cake in an airtight container in the fridge. Let it come to room temperature before serving. Serve with whipped cream or vanilla ice cream for extra indulgence.
What are some common troubleshooting tips for the Blackout Cake?
Issues like dry cake or frosting problems can happen. Temperature issues like cracking or melting frosting can also occur. Follow the recipe and instructions closely to avoid these problems.